How to Build Your First Gaming PC: A Step-by-Step Guide for Beginners
Building your first gaming PC might sound challenging, especially if you’ve never handled computer parts before. But here’s the exciting part. It’s a lot easier than it seems and is one of the most rewarding experiences for any gamer.
Have you ever wished for a gaming computer that runs fast, plays your favorite games smoothly, and doesn’t cost too much? Making your own gaming PC can help you get all that. When you build it yourself, you choose the parts that fit your games, budget, and style.
You can even make it look cool with lights and colors. It’s not just fun, but it also teaches you how a computer really works. Many gamers now prefer building their own PCs because it gives them more power and control.
From setting your goals and picking components to assembling your PC and getting it ready for your favorite games, everything is included. Whether you’re in it for casual gaming or dreaming of high-frame-rate performance, we’ll make sure you get there step by step.
You’ll be confident in your ability to plan, build, and optimize a gaming PC that feels truly yours.
How to Build Your First Gaming PC
Building a gaming PC means putting different parts together to make one strong machine. First, you choose the right parts like the CPU and graphics card. Then you carefully install each part inside the case. After that, you add power, connect everything, and test it to make sure it works well.
- Understanding what you want from your system
- Setting a clear budget
- Choosing the right components for your needs
- Physically assembling the PC
- Installing software and optimizing settings
- Troubleshooting any hiccups
Each of these steps is manageable, even for complete beginners. Let’s begin with setting your goals.
Determining Your Gaming PC Goals and Budget
Before you buy anything, you need to think about what you want your gaming PC to do. Some games need more power than others. Also, your screen’s resolution and refresh rate can change what parts you need. A clear plan will help you spend your money the right way.
Understanding PC Gaming Requirements
- Target Games and Genres: Think about what games you love to play. Do you like fast games like Call of Duty or simple ones like Minecraft? Big games need stronger parts, but small games can run on cheaper setups. Knowing your favorite game types will help you pick the right components.
- Desired Resolution and Refresh Rate: Your screen shows the game. If you want sharp, clear pictures (like 1080p or 1440p) or super-smooth motion (like 144Hz), your PC needs better parts. A strong GPU is important for this. Decide what you want so you don’t overspend or get less than needed.
- Considering Other Uses: Will you use your PC only for gaming? Or also for school, videos, or work? If you want to do more than gaming, then you might need more RAM, better storage, or even a stronger processor. Think about all your needs now to avoid future problems.
Setting a Budget
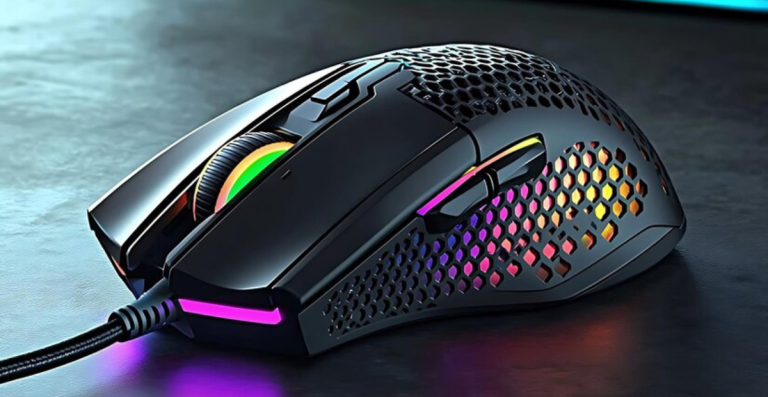
- Accounting for Peripherals and Software: Many people forget to count the cost of things like a monitor, keyboard, mouse, and Windows. These are also part of your gaming setup. Write these in your budget so there are no surprises later.
- Monitor
- Keyboard and mouse
- Headset or speakers
- Planning for Future Upgrades: You don’t have to buy the best parts right now. But try to buy a motherboard or power supply that lets you upgrade later. This saves money in the future and makes your PC last longer.
- General Budget Allocation: Most of your budget will go to the graphics card and CPU. These parts affect your game’s speed the most. Next comes RAM, storage, and the motherboard. Don’t spend too much on one thing and too little on another. Keep a balance.
Example Budget (For a $1000 PC Build)
- CPU – $150
- GPU – $350
- Motherboard – $100
- RAM (16GB) – $60
- Storage (1TB SSD) – $70
- Power Supply (PSU) – $60
- Case – $60
- Cooling (Fans or AIO) – $30
- Windows License – $20
- Keyboard & Mouse – $50
- Monitor – $50
Selecting the Right Components
It’s time to choose the parts that will power your PC. Each part has its own job, and picking the right ones will make sure your games run fast and smoothly. Some games need a strong graphics card. Others need more RAM or a better processor. Understand what each part does and how to pick the best one for your setup.
Let’s start with the CPU, the brain of your gaming PC.
Central Processing Unit (CPU)
The CPU is like the brain of your computer. It controls how fast your games and programs run. A strong CPU helps your system stay fast, even when you are playing big games or doing many things at once, like gaming and streaming together. Picking the right CPU is one of the most important parts of your build.
Understanding CPU Cores and Clock Speeds
CPUs come with different numbers of cores. More cores mean your computer can handle more tasks at the same time. For gaming, 6 to 8 cores is usually enough. Clock speed tells how fast the CPU works. It is shown in GHz. A higher number usually means better speed. A CPU with 3.5 to 4.5 GHz is good for most games.
Intel vs. AMD in 2025
In 2025, Intel and AMD will both make strong CPUs. Intel’s 14th-gen chips are fast for gaming. AMD’s Ryzen 7000 series is great too, and often better for multitasking. Intel is good if you only want to play games. AMD is better if you also want to stream or do other work.
Socket Compatibility
Every CPU needs the right motherboard to work. This is called socket compatibility. Intel CPUs in 2025 use LGA 1700 sockets. AMD’s Ryzen 7000 uses AM5 sockets. You must check the socket before you buy. If the CPU and motherboard don’t match, they won’t fit together.
Considering Integrated Graphics (iGPU)
Some CPUs come with built-in graphics. These are called iGPUs. They help you use your PC without a graphics card. This is useful if you plan to add a GPU later. Intel CPUs with “F” at the end do not have iGPUs. AMD CPUs with a “G” at the end usually do.
Graphics Processing Unit (GPU)
The GPU is the heart of your gaming experience. It controls how your games look and how smoothly they run. If you love games with rich details, fast action, or high frame rates, then the GPU will be your most important part. It handles the graphics, lighting, shadows, and movement on your screen.
Choosing the right GPU means you’ll enjoy better visuals and smoother gameplay.
The Critical Role of the GPU in Gaming
Your graphics card is what makes your games come alive. It handles all the images, effects, and animations. If your GPU is weak, your game might lag or look blurry. A strong GPU makes your game look sharper and run faster.
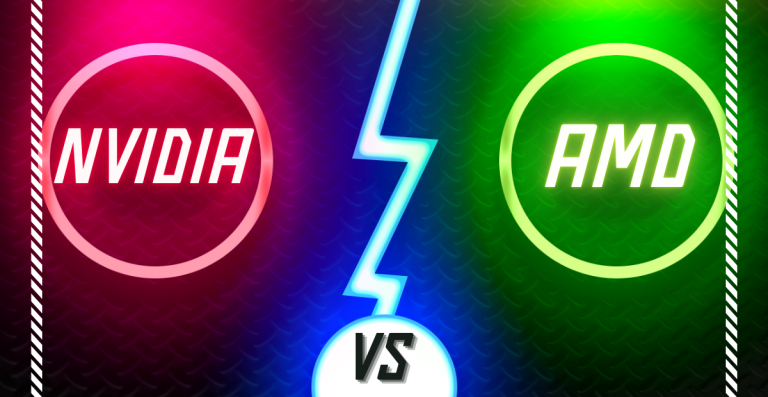
2025 NVIDIA GeForce RTX and AMD Radeon RX Series
In 2025, NVIDIA and AMD are the two top choices. NVIDIA has the GeForce RTX 4000 and newer 5000 series. AMD has the Radeon RX 7000 and upcoming RX 8000 models. Both brands offer good performance. NVIDIA is known for ray tracing and DLSS, while AMD is great for value and strong frame rates.
Matching the GPU to Your Target Resolution and Refresh Rate
If your monitor is 1080p, you don’t need the most powerful GPU. But for 1440p or 4K gaming, you’ll need a stronger card. Also, if you want to play at 120Hz or 144Hz (which makes games feel very smooth), your GPU must keep up. Always match your GPU to your screen’s resolution and refresh rate.
Power Requirements of Modern GPUs
New GPUs use a lot of power. Some need special cables and more wattage from the power supply. Before buying a GPU, check how much power it needs and make sure your power supply (PSU) can handle it. For most modern cards, a 650W to 850W PSU is a safe range.
Memory and Storage Solutions
Having enough memory and fast storage is vital for smooth gaming performance and quick load times.
DDR4 vs. DDR5
DDR5 offers better bandwidth and faster speeds compared to DDR4, making it ideal for future-proofing your build. However, DDR4 is still a solid choice for most gamers.
Optimal RAM Capacity for Gaming
For gaming, 16GB of RAM is typically enough. However, if you plan on multitasking or doing video editing, 32GB may be beneficial.
RAM Speed (MHz) and Timings (CAS Latency)
Faster RAM can improve performance, but the differences are usually small in gaming. Aim for RAM with speeds of 3200MHz or higher, and consider lower CAS latency for the best performance.
NVMe vs. SATA SSDs
NVMe SSDs are much faster than SATA SSDs, providing quicker load times and system responsiveness. For a gaming PC, an NVMe drive is recommended for your primary drive.
Choosing the Right Storage Capacity
A 500GB or 1TB SSD is ideal for your operating system and key games. You can also include a larger HDD (2TB or more) for additional mass storage, like movies and less frequently played games.
Using HDDs for Mass Storage (Optional)
HDDs are slower than SSDs but offer larger storage capacities at a lower cost. They’re great for storing media files and less demanding games.
Motherboard and Form Factors
The motherboard connects all your components, so choosing the right one is crucial. Additionally, it’s important to ensure it fits inside your case and has the features you need.
Chipset Compatibility with Your Chosen CPU
Ensure your motherboard chipset is compatible with your CPU. For Intel, look for the latest Z-series boards, and for AMD, consider B550 or X570 boards.
Form Factors (ATX, Micro-ATX, Mini-ITX)
Motherboards come in different sizes: ATX (full-sized), Micro-ATX (compact), and Mini-ITX (small form factor). Choose based on your case size and expansion needs.
Key Features to Look For
Make sure the motherboard has the required slots for your GPU, RAM, and storage. Look for features like PCIe 4.0, USB 3.2 ports, and built-in Wi-Fi/Bluetooth for added convenience.
Future-Proofing Considerations
Select a motherboard that supports the latest standards (e.g., PCIe 4.0) to ensure it can handle future upgrades without bottlenecking your performance.
Power Supply Unit (PSU)
The power supply unit (PSU) is a crucial component in your gaming PC build, as it provides the necessary power for all the other components. Choosing the right PSU ensures your system runs efficiently and remains stable.
Determining the Correct Wattage
The wattage of your PSU depends on the combined power needs of your components, especially your GPU and CPU. You should select a PSU that provides at least 20-30% more wattage than your system’s estimated power consumption to avoid overloading. For mid-tier gaming builds, a 650W to 750W PSU should suffice, while high-end builds with powerful GPUs may require 850W or more.
Efficiency Ratings (80+ Bronze, Gold, etc.)
PSUs come with efficiency ratings, which indicate how much energy is wasted as heat. Look for an 80+ rating, with 80+ Gold being the ideal for most gaming builds. The higher the efficiency, the less electricity is wasted, which also leads to lower electricity bills and less heat generation.
Modular vs. Non-Modular PSUs
Modular PSUs allow you to connect only the cables you need, leading to better cable management and airflow. Non-modular PSUs come with all cables permanently attached, which may lead to excess cables in your case. Modular PSUs are more expensive but are generally recommended for better aesthetics and easier management.
Choosing Reputable Brands
Opt for well-known PSU brands, like Corsair, EVGA, Seasonic, and Cooler Master, to ensure reliability and safety. A high-quality PSU is essential for long-term stability and can help prevent damage to your components in case of power surges or failures.
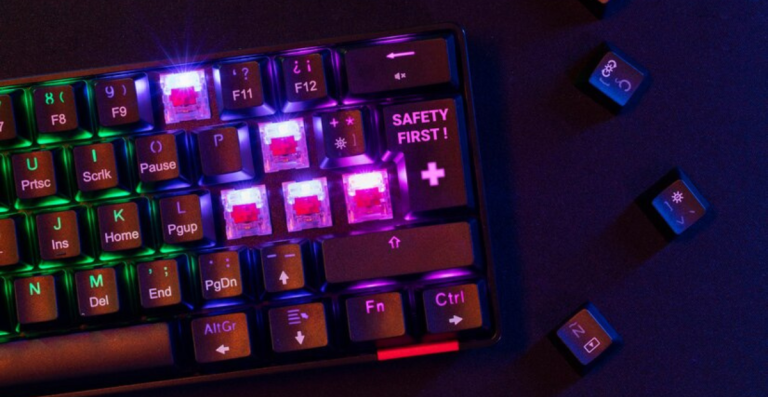
Cooling Systems
Cooling is essential to maintaining the performance and longevity of your gaming PC. Without adequate cooling, components such as the CPU and GPU can overheat, leading to throttling or even hardware damage. There are two main types of cooling: air cooling and liquid cooling.
Importance of Cooling Solutions
Cooling solutions are critical in a gaming PC, especially when pushing hardware to its limits during intense gaming sessions. Poor cooling can result in reduced performance due to thermal throttling, where the system slows down to prevent overheating. Effective cooling systems ensure your PC runs smoothly and maintains stable performance.
CPU Air Coolers vs. Liquid Coolers (AIOs)
Air coolers are the more common and affordable option, with a heatsink and fan that dissipate heat from the CPU. These are easy to install, and while they can provide sufficient cooling for most gaming setups, they can be a bit noisy.
Liquid coolers, or All-in-One (AIO) coolers, use a closed-loop system with a pump, radiator, and liquid coolant to transfer heat away from the CPU. They are more efficient at cooling, especially for high-performance CPUs, and tend to operate quieter than air coolers. However, AIO coolers are generally more expensive and can require more space.
Case Fans and Airflow
In addition to CPU cooling, case fans play a key role in maintaining airflow within the PC. Proper airflow is necessary to prevent heat buildup inside the case. You’ll want to ensure that your case has enough intake and exhaust fans to direct air across the components and keep temperatures low. High-quality fans help to manage this airflow more effectively, improving the overall cooling efficiency of your system.
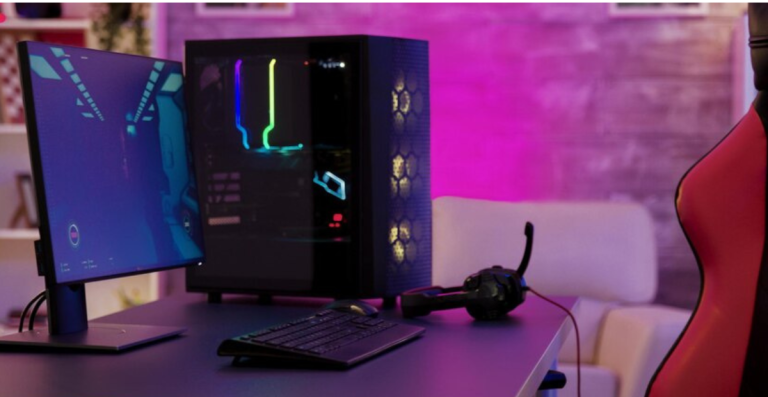
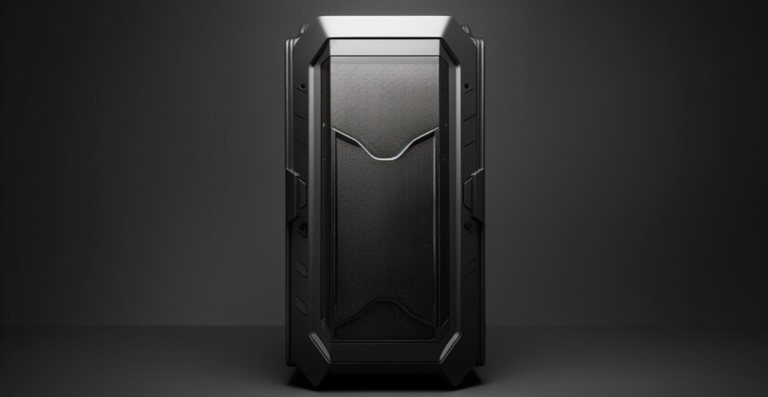
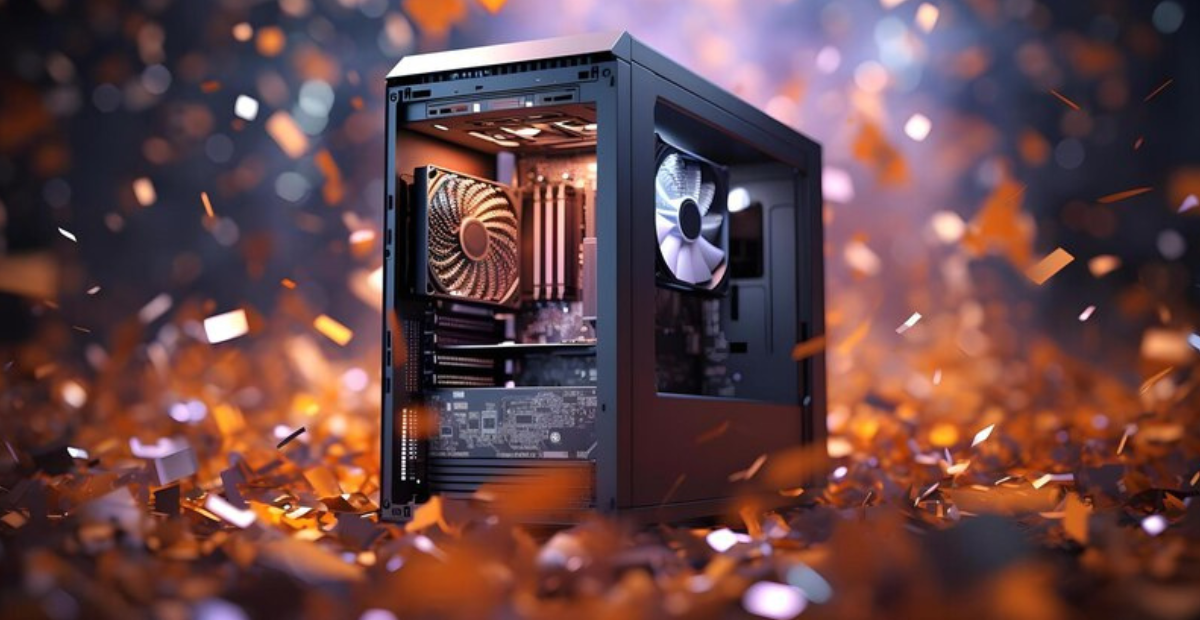
Assembling Your Gaming PC
Assembling your gaming PC is the most exciting part of the build process. It’s when all your components come together to form a high-performance machine that’s uniquely yours. Follow these steps carefully to ensure your build goes smoothly.
Case Prep and Component Installation
Preparing Your Workspace and Tools
Before you begin, make sure you have a clean, spacious workspace. Lay down an anti-static mat to protect your components from static electricity. You’ll need basic tools like a screwdriver and possibly some thermal paste for your CPU cooler.
Installing the CPU on the Motherboard
Start by installing the CPU into the motherboard’s socket. Align the CPU correctly by matching the notches on the CPU with those in the socket. Carefully place the CPU into the socket and lock it in place by lowering the retention arm.
Installing RAM Modules
Next, install your RAM into the motherboard. RAM sticks should click securely into place. Make sure to insert them into the correct slots for dual-channel memory configuration, usually marked with different colors on the motherboard.
Mounting the Motherboard in the Case
Place the motherboard into your case and align it with the I/O shield at the back of the case. Secure it with screws to prevent any movement. Make sure the motherboard sits flush and is stable within the case.
Installing the GPU
Now, install the graphics card into the PCIe slot. Press down until it clicks securely into place. Depending on your GPU, you may also need to install additional power connectors to the GPU from the power supply.
Installing Storage Devices (SSDs and HDDs)
If you’re using an SSD, install it in one of the available M.2 slots or in the designated 2.5-inch SSD mount in the case. For HDDs, install them in the hard drive bays and secure them with screws.
Installing the Power Supply Unit
Finally, install the power supply (PSU) in its designated location, usually at the bottom or top of the case. Connect the necessary power cables to the motherboard, GPU, and storage devices. Don’t worry about cable management just yet; we’ll cover that in the next section.
Wiring and Power Connections
Once all your components are securely in place, connect all the power cables from your PSU to the appropriate components. Start with the 24-pin ATX power cable to the motherboard, then connect the 8-pin CPU power cable, GPU power cables, and any storage device cables. Make sure each cable is firmly connected, and keep the wiring tidy for good airflow.
System Cooling Considerations
Ensure you’ve properly connected the cooling system and placed any case fans in optimal positions. Typically, fans should be installed with intake fans at the front of the case and exhaust fans at the rear and top to create a good airflow direction. Adjust the fan placement if necessary for maximum cooling efficiency.
Final Steps and Testing
With all your components installed and connected, the final step is to check everything before powering on the system. Ensure all cables are connected and nothing is loose. When you’re ready, connect your monitor, keyboard, and mouse. Press the power button and check if the system boots up. You should hear the fans spinning, and the monitor should display the BIOS screen.
Optimizing Your Gaming Experience
After building your gaming PC, optimizing it is key to achieving peak performance. Start by installing your operating system (Windows 10/11) and ensuring all necessary drivers for your motherboard, peripherals, and GPU are up to date.
Adjust in-game graphics settings to balance visual quality and frame rates, and use performance monitoring tools like MSI Afterburner to track system performance. If you’re looking for even more power, consider overclocking your CPU or GPU, but proceed with caution. Finally, add personal touches like LED lighting or custom cables to make your gaming rig truly yours.
Troubleshooting Common Issues with New PC Builds
Building your gaming PC is a rewarding experience, but occasionally, you may face issues. While they can be frustrating, most problems are solvable with some simple troubleshooting. Here’s a breakdown of common issues and how to address them effectively.
No Power:
- Check power supply connections and cables.
- Ensure the PSU switch is on.
No Display:
- Verify GPU and monitor connections.
- Try different cables or ports.
- Test with another monitor.
System Boots but No OS:
- Check boot device settings in BIOS.
- Verify hard drive connections.
Component Not Recognized:
- Reseat components and check connections.
- Update drivers and BIOS.
- Test with different slots if necessary.
Overheating:
- Ensure proper airflow and fan functionality.
- Reapply thermal paste if needed.